
When I first heard about DTF printing, I was skeptical. As someone who had spent years wrestling with vinyl cutters and screen printing, the idea of a digital transfer that could handle intricate details on any fabric seemed too good to be true. But after testing dozens of prints on everything from cotton tees to nylon jackets, I can confidently say that DTF is a game-changer. Whether you're a hobbyist or a small business owner, understanding the ins and outs of DTF printing can save you time, money, and a lot of frustration. In this guide, I'll walk you through the entire process, share the lessons I learned the hard way, and help you achieve professional results right from your first print.
What Exactly Is DTF Printing?
DTF stands for Direct-to-Film. Unlike DTG (Direct-to-Garment), which prints directly onto the fabric, DTF involves printing your design onto a special film, coating it with a hot-melt adhesive powder, and then transferring it to the garment using a heat press. This two-step process opens up a world of possibilities: you can print on cotton, polyester, blends, and even tough materials like canvas and nylon. The prints are incredibly durable, stretchy, and vibrant, making them ideal for everything from custom t-shirts to promotional items.
The magic of DTF lies in its versatility. Because the design sits on top of the fabric rather than being absorbed into it, you can achieve bright whites and rich colors on dark garments without the need for a white underbase. Plus, the ability to print fine lines, gradients, and photographic images means your creativity isn't limited by the medium.
How Does the DTF Process Work?
Let's break down the steps so you can see exactly what's involved. The process is straightforward, but each stage has nuances that affect the final quality.
Step 1: Design and Print
Everything starts with your artwork. You'll need a printer equipped with DTF inks (usually CMYK plus white) and a roll of PET film. The film is coated with a release layer that holds the ink. When you send your design to the printer, it prints the image in reverse order: first the white ink layer (which acts as a base), then the colors on top. This ensures that when transferred, the white is behind the colors, making them pop.
One critical tip: always print on the matte side of the film. If you print on the shiny side, the ink won't adhere properly, and your transfer will fail. I learned this the hard way after ruining an entire roll of film.
Step 2: Apply the Adhesive Powder
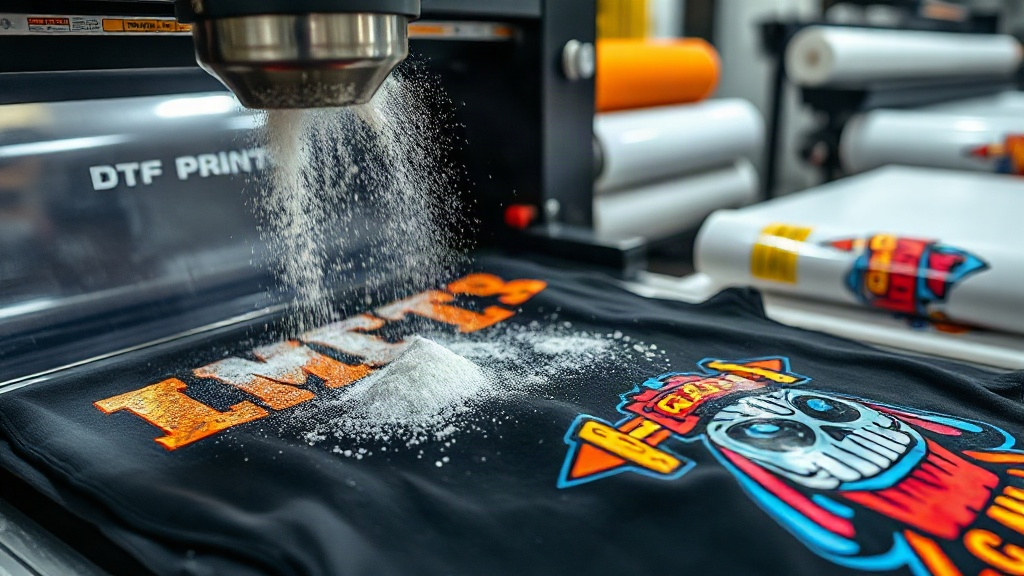
Once printed, the film is still wet. You need to sprinkle a hot-melt adhesive powder over the design while it's wet. The powder sticks to the ink but not to the bare film. Then, you shake off the excess and return the film to the printer (or use a separate powder shaker and oven) to melt the powder. This step is crucial because the powder becomes the glue that bonds the design to the fabric during heat pressing.
Getting the powder application right takes practice. Too little powder, and the transfer won't stick; too much, and you'll get a stiff, plasticky feel. I recommend using an automatic powder shaker if you're doing volume, but for small batches, a manual shaker works fine. Just be sure to work in a well-ventilated area and wear a mask to avoid inhaling the fine particles.
Step 3: Cure the Powder
After powdering, the film goes through a curing oven or under a heat source to melt the powder into a smooth, clear layer. The temperature and time depend on your powder and film, but typically it's around 160-170°C for 2-3 minutes. If you don't cure it properly, the powder won't melt completely, leading to poor adhesion and a rough texture. I use a small conveyor oven for consistent results, but a heat gun can work for DIY setups if you're careful.
Step 4: Heat Press Transfer
Now comes the fun part: transferring the design to your garment. Set your heat press to the recommended temperature (usually 150-160°C) and pressure (medium to firm). Place the film on the fabric with the design facing up, cover it with a protective sheet (like parchment paper or a Teflon sheet), and press for 10-15 seconds. Then, while it's still hot, peel off the film. You can do a hot peel or cold peel depending on the film type; most DTF films are hot peel, meaning you remove the film immediately after pressing while it's still warm. This leaves the design permanently bonded to the fabric.
After peeling, I like to do a second press for 5 seconds with a protective sheet to ensure the edges are sealed and the print is smooth. This step isn't always necessary, but it adds durability, especially for garments that will be washed frequently.
Choosing the Right Materials for DTF Printing
Not all films, powders, and inks are created equal. Your results will vary significantly based on the quality of your supplies. Here's what I look for:
- Film: Look for double-sided matte PET film. It should be thin enough to feed through your printer smoothly but thick enough to handle the powder and curing without warping. I prefer films around 75 microns thick.
- Powder: TPU-based hot-melt powder is the standard. It's flexible, wash-resistant, and bonds well to various fabrics. Particle size matters: finer powder (80-200 microns) gives a smoother finish, while coarser powder is more forgiving but can feel grainier.
- Inks: Use DTF specific inks. They are formulated to be thicker and more flexible than regular DTG inks. Pigment-based inks are common, but you'll also find dye-based options. I stick with pigment inks for their longevity.
- Printer: You can convert an Epson printer (like the L1800 or P800) to DTF with a conversion kit, or buy a dedicated DTF printer. Dedicated printers are more expensive but come with built-in powder shakers and ovens, streamlining the process.
Common DTF Printing Mistakes and How to Avoid Them
Even with the right equipment, things can go wrong. Here are the pitfalls I've encountered and how to sidestep them.
1. Printing on the Wrong Side of the Film
As mentioned, always print on the matte side. If you're unsure, breathe on the film: the matte side will show a faint fog, while the shiny side stays clear. Mark your film rolls if needed.
2. Inconsistent Powder Application
Uneven powder leads to patchy transfers. Use a shaker that distributes powder evenly, and gently rock the film back and forth to coat the design. Tap off excess powder thoroughly.
3. Incorrect Curing Temperature
If the powder doesn't melt completely, the transfer will peel. Invest in an infrared thermometer to check the actual temperature of your oven or heat source. Don't rely on dial settings alone.
4. Pressing at the Wrong Temperature or Pressure
Too hot, and the film may curl or the design may bleed. Too cold, and the adhesive won't activate. Too much pressure, and the design can spread; too little, and it won't adhere. Always test on a scrap garment first.
5. Peeling at the Wrong Time
Hot peel vs. cold peel is film-dependent. Using the wrong method can cause the design to crack or leave residue. Read the film instructions carefully.
DTF vs. Other Printing Methods: A Quick Comparison
How does DTF stack up against DTG, screen printing, and vinyl? Here's a quick rundown:
- DTG: Best for 100% cotton, but requires pretreatment and can be less vibrant on dark shirts. DTF works on more fabrics and doesn't need pretreatment.
- Screen Printing: Cost-effective for large orders but setup is time-consuming and costly for small runs. DTF is ideal for one-offs and small batches.
- Vinyl: Great for simple designs but can't handle complex images or gradients. DTF excels at detailed, multi-color artwork.
In my experience, DTF offers the best balance of quality, versatility, and ease of use for a wide range of projects.
Frequently Asked Questions About DTF Printing
What fabrics can I use with DTF printing?
DTF works on almost any fabric, including cotton, polyester, blends, nylon, canvas, and even leather. It's especially useful for polyesters and blends where DTG struggles. However, for highly stretchy fabrics like spandex, use a powder with high elasticity to prevent cracking.
How do I wash DTF-printed garments?
Turn the garment inside out and machine wash cold. Avoid fabric softeners and bleach. Tumble dry low or hang dry. With proper care, DTF prints can last 50+ washes without fading or peeling.
Can I use a regular heat press for DTF?
Yes, any heat press that reaches 160°C and provides consistent pressure will work. A clamshell or swing-away press is fine. Just ensure the pressure is even across the platen.
Do I need a special printer for DTF?
You can convert a standard Epson printer with a DTF ink kit, but dedicated DTF printers are more reliable for frequent use. They come with modified printheads and ink systems designed for the thicker inks.
How much does it cost to start DTF printing?
Initial costs vary. A converted printer setup can cost around $500-$1000, while a dedicated DTF printer with shaker and oven can run $2000-$5000. Consumables (film, powder, ink) add ongoing expenses, but the per-print cost is low, especially for small batches.
Mastering DTF printing takes practice, but the rewards are well worth it. With the right knowledge and a bit of patience, you'll be producing stunning, durable transfers that impress your customers and elevate your craft. So fire up your printer, and let your creativity flow.